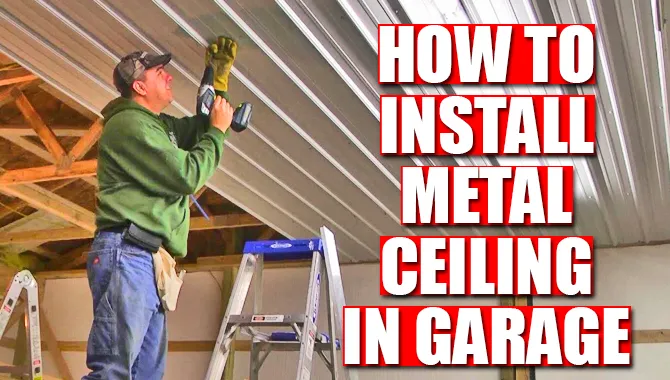
Metallic ceilings aren’t simply restricted to indoor house decor applications. In addition to being a lovely enhancement to any house, you will certainly see those metallic ceilings in various other buildings that make them a good product to use in any workshop and garage.
When refurbishing your garage or various other outside work areas, you must think about steel ceiling panels. So, how to install metal ceiling in garage? If you think about replacing your garage ceiling with metal, It will be a magnificent choice. You might not know the installation process of a metal ceiling in your garage. I will guide you till the end to set up a metallic ceiling in your garage.

5 Steps On How To Install Metal Ceiling In Garage

Installing a metal ceiling in your garage is a great way to give it a sleek and modern look. Here are some steps to help you install a metal ceiling in your garage:
1. Measure and plan: Start by measuring the area of your garage where you want to install the metal ceiling. This will help you determine how many panels you will need. Make sure to also consider any obstructions, like lights or vents, that may affect the installation.
2. Prepare the surface: Before installing the metal ceiling, make sure the surface is clean and free from any debris. If there are any existing ceiling materials, remove them and make sure the surface is smooth.
3. Install furring strips: Furring strips are thin pieces of wood or metal that create a framework for attaching the metal ceiling panels. Install these strips perpendicular to the joists in your garage ceiling, using screws or nails.
4. Cut and attach panels: Measure and cut the metal ceiling panels to fit your garage space using tin snips or a circular saw with a metal-cutting blade. Attach the panels to the furring strips using screws or clips specifically designed for metal ceilings.
5. Finish and paint: Once all the panels are installed, finish off the edges with trim pieces to give it a polished look. You can also choose to paint the metal ceiling to match your garage’s aesthetic.
By following these steps, you’ll be able to successfully install a metal ceiling in your garage and enjoy its durability and sleek appearance for years to come.
Metal Ceiling Tiles Types
A metal ceiling is a building component consisting of metal plates with layouts pushed right into them. Metal ceilings were preferred in Victorian structures in N. America in the early 20th and the late 19th century.
Whether it’s for aesthetic layout or to enhance the worth of the garage, there are lots of factors to set up metal ceilings. Metal ceilings have several choices for layout and installment! Relying on your scenario, one kind of installment could function far better than one more.
Nail-Up Metal Tiles

These tiles are indicated to be nailed right inside the ceiling. The nails maintain them safeguard and also stop them from being mobile. Just utilize a crowbar for utilizing, and the nails ought to stand out appropriately. This approach of an installment is extremely simple.
Drop-In Tiles

Drop-in tiles are especially practical for a business structure. You will require a grid system readily available to line your ceiling. When the grid system is in location, you require to put the tiles right into the grids. The setup is less complicated.
Snap-Grid Tiles
Snap-grid tiles are a brand-new style. It provides for the Drop-In and Deep Drop-Ins; this breeze grid is screwed or nailed right into the ceiling.
Deep Drop-In
Deep drop-in tiles are almost like drop-in tiles. The only distinction between a deep is that it essentially goes down much more from the ceiling than the normal drop-ins.
This is what offers the ceiling a dimensional appearance as well as form. Some deep declines reach an inch from the ceiling. Take into consideration all these various alternatives and figure out which one functions perfectly for you if you’re utilizing a metal ceiling to remodel your garage.
Metal Ceiling Materials

Various metals are used to fabricate the metal ceilings. These might be-
- Stainless steel: This is the Alloy of carbon and iron that is extra immune to corrosion, discoloration, and deterioration than normal steel.
- Anodized Aluminum: The anodizing procedure makes this product unable to flake, chip, or peel off and also come to be unsusceptible to extreme weather.
- Lightweight aluminum: It is 3 times lighter than iron, virtually as solid as steel, and unbelievably simple to develop right into various forms.
- Printed: Offered a unique kind of appearance or visuals of your choice, printing on metal permits you to bring innovative services as well as great graphics to a wall or metal ceiling
- PVD Steel: Generated with the procedure of PVD or Physical Vapor Deposition, which boosts the efficiency of stainless steel by raising deterioration, scrape and wear resistance.
- Timber Veneer: A slim layer of timber is used throughout the metal panels. This offers the visual of timber with the stamina of metal.
- Bronze: This is made up of tin & and copper that is harder and more immune to rust than iron.
- Copper: Substantially immune to rust while using a distinct coating of color.
- Zinc: Zinc is an environmentally-friendly product because of its amazing long life; the product restores as well as recovers itself, implying it additionally needs no maintenance.
Metal Ceiling Advantages

- Toughness: Metal panels are more powerful and much less susceptible to splits and breaks than conventional ceiling products while still providing simple accessibility to the ceiling gap. Products in the ceiling gap commonly require normal repair and maintenance. Having the ability to gain access to this location without concern of damaging ceiling floor tiles. Metal ceilings are likewise moisture immune which reduces discoloration and collapsing from leakages.
- Acoustics: Thinking about metal as an audio insulator and also a muffler might appear counter-intuitive. Metal ceilings are offered that aid reroutes or soak up noise, avoiding an area from ending up being a resemble chamber. Acoustic tiles produce clear speech by absorbing the noise. Ceilings with hefty inlays likewise undermine noise from adjacent locations.
- Look: Metal ceilings are offered in a wide range of textures, coatings, finishes, and styles. Metal can be covered with any color. One method to utilize this kind of product is to cover an awful plaster ceiling. If you do not want to repaint, metal can be found in several eye-catching shades as well as surfaces of its very own: steel, brass, copper, lightweight aluminum, and chrome all vary in luster as well as color.
- Fire Protection: Structures are boosting in complexity and dimension; therefore, fire defense is of utmost relevance today. As a result of the possibility of the high damage of fire, to life as well as health and wellness, in addition to beneficial residential property, taking the ideal safety measures is crucial to guarantee your room is secured.
- Protection from corrosion: Protection from corrosion describes steps to stay clear of problems on metal elements brought on by rust.
- Seismic Safety: All metal items are made and examined to guarantee they can take anything tossed towards. Metal ceilings are constructed to endure big influences, earthquakes, and solid winds.
- Ecological Sustainability: Metal can be forever reused and also recycled, making it an exceptionally environment-friendly product.
Metal Ceiling Installation Process On Your Garage

The metal utilized for the ceiling panels is heavy. This is one of the toughest components of the process: locating the joists and then screwing and increasing plywood sheets to them.
A row of panels needs to be focused over the entrance to the space, as well as the joints in between panels need to overlap as if cut sides deal with far from the space’s entrance. This will certainly make the ceiling appearance neater to a person going through the door.
First Step
Plywood underlayment creation-
Switch off the area’s power at the breaker as well as get rid of ceiling components. Utilize a driver with a ⅛- inch little bit to make exploratory openings to locate a stud. Mark it throughout the ceiling in 16-inch intervals to find various other studs. Break chalk lines along with the facility of every stud and note their areas onto the wall surfaces.
Second Step
Use T-brace to hold plywood-
When you run into an electric box or various other ceiling components, utilize a compass or square to attract its overview on the plywood. Make the intermediary with a jigsaw.
Third Step
Layout line marking-
If one row is focused over the space’s entryway, the panels will certainly look ideal. Begin by finding the middle point of the entrance. Step one foot away from the navel. Break a chalk line that begins at this moment and also runs vertically to the orifice. Mark the navel of the line. Utilize a compass to make a bisecting angle. Break a chalk line throughout the size of the space along that vertical line.
Fourth Step
Panels nailing up-
As you start nailing up panels, leave a couple of sides loosened so you can put the side of the following panel to be set up below it. The panels need to overlap constantly. Angle the nails a little. Do not nail any sides that require overlap in the following panel. Ceiling panels have increased bubbles along their sides, which develops a best 1/4- inch overlap. Put the side of the 2nd panel under the very first panel, aligning the bubbles.
Fifth Step
Trim the excess items to fit-
Make a cutout that is comparable to the metal when you get to a plywood cutout. Make use of a fine-point pen and a straightedge- or a compass– to attract the component’s synopsis. Attract a 2nd line 1/4- inch inside the initial to develop a somewhat smaller-sized intermediary.
Location a timber scrap behind the panel and pierce a ⅜- inch beginning opening for the metal cuts. Cut along the line; after that, make 1/4- inch alleviation cuts along the intermediary side.
Sixth Step-
Joint sealing-
Hold a 1×4 block at a 45-degree angle versus the slim groove at a joint between 2 ceiling panels. Carefully touch the block using a hammer along the joint to shut any little voids. Take care not to touch on the elevated dimples, or you’ll squash them. Seal all the joints in between the panels in this way.
Seventh Step-
Cornice hanging-
Set out the precut coped and mitered cornice items on the flooring to figure out just how they’ll be organized on within and outdoors edges. Coped items glide right into square-cut items at within edges. Mitered items satisfy at 45-degree angles at outdoors edges. Accomplish to the wall surface as well as ceiling every 6 inches.
Proceed setting up square-cut cornice items until you get to the following edge. Cut the last item to fit. After mounting cornice items throughout the very first wall surface, carry on to the surrounding wall surface. Set up the cornice remainder around the space. Seal cornice joints. You can prime as well as after that repaint the ceiling if preferred.
Conclusion
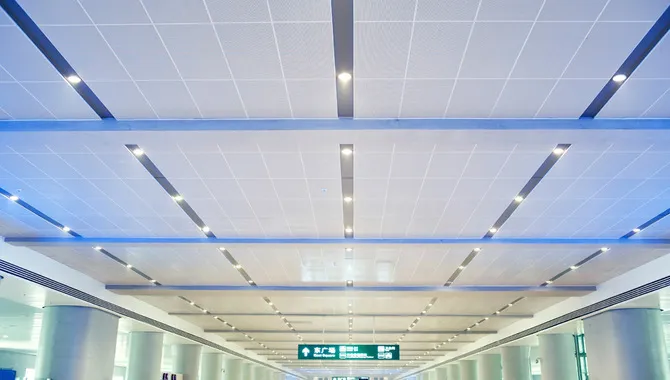
Metal ceilings are mostly utilized in non-residential structures, such as workplaces, medical facilities, airport terminals, shopping malls, and garages. Metal ceilings use various benefits in regards to convenience, availability, and also strength.
They can be powder coated, bare metal, polished or brushed. Metal ceiling products likewise can be found in various forms to give different looks. I hope now you understand how to install metal ceiling in garage. Follow the above guideline to install a metallic ceiling in your garage. Seek a garage ceiling professional If you are puzzled about these.

I am passionate about tools and electric work. I love finding new tools and experimenting with them.

