Concrete is a composite material made up of coarse and fine aggregates that are cemented together through a cement paste or fluid cement that cures or hardens over time.
Concrete is most often utilized as the foundation in the construction sector for most projects. So, how to slope concrete? Reinforced concrete is utilized in slab construction, stair creation, architectural structures, and superstructure construction sites.
These are some of the few instances of how concrete is used in buildings. When it comes to concrete work, the most common method is to utilize cast-in-place concrete.
Basic foundations, superstructures, sewerage systems, water supply, parking garages, construction of floors, and external surfaces are all examples of where concrete is utilized.
There might be different objectives why you require to slope a concrete surface. You are in the right hands! I will share some effective steps you can utilize to make a slope a concrete surface.

Concrete Curing Mechanism
- Concretes can be found anywhere. Consider all of the actual contacts you have seen in the past 24 hours. Every one of these concrete buildings is made of a cement-water combination with aggregate. It is essential to differentiate between cement and concrete since they are not the very same material. Concrete is produced using cement!
- Water is an important reactant in the hydration of cement. Cement and water initially combine to form a paste of cement. The cement pastes further proceed to react and set or harden. Through the chemical action of hydration, this paste combines the aggregate particles. A chemical reaction takes place slowly during cement hydration, ultimately producing new solid structures, following heat and other observable indicators.
- The concrete’s strength depends on the cement mass to water ratio and the conditions of curing. A high cement mass and water ratio result in a weak concrete block. This weakness is because of the increased space between particles or porosity caused by the process of hydration. The majority of concrete is produced with a cement mass and water ratio of 0.6 to 0.35.
Importance Of Slopes
Laundry rooms, shower floors, entryways, floors of garages, and patios are examples of locations where the flooring could have drainage constructed into it to assist drainage water to a specified spot. The degree of sloping varies with flooring.
However, all flooring having drainage follow the same fundamental construction criterion. Sloping guarantees that water flows properly each time.
Proper drainage prevents mildew and water damages. An appropriately sloped drain will send all water. Humidity will be sent down the drain & far from the finished surface by an appropriately sloped drain.
Measurement Of Concrete Slope

A quarter-inch slope for every feet of length is the recommended slope for proper concrete drainage. Simply double the length by one-quarter to have the height difference between one side of a walkway or patio and the other.
This measurement indicates that the edge of a 10-foot-long patio emerging from a house will decrease 2 and a half inches from its initial point.
A sidewalk will often naturally slope outward from a house or other building. However, if it does not, you must calculate the correct slope in order to minimize drainage problems.
A concrete sidewalk of 4 feet in diameter which runs parallel to a home should slope 1 inch away from the property. Apply the one-quarter inches slope for every feet of length criterion if this is parallel to a building.
This slope should prevent water from becoming an uninvited guest outside your front entrance.
Other Inspections
A word of caution: a typical measure of concrete sloping is a 3/4 inches reduction per foot. This slope may fluctuate from 1/8th inches to 3/8th inches per feet, based on the circumstances of the case and the quantity of rainfall predicted.
In a much drier environment? You’ll probably be fine with just 1/8th. In extremely rainy areas, 3/8th inches per feet may be required for effective drainage of water.
The degree of slope can also be affected by the surface’s susceptibility to sun and heat. Of course, a sun-bathed terrace on the west or south side of your house will dry quicker than just a shadowed surface of the concrete.
Steps Of Concrete Sloping

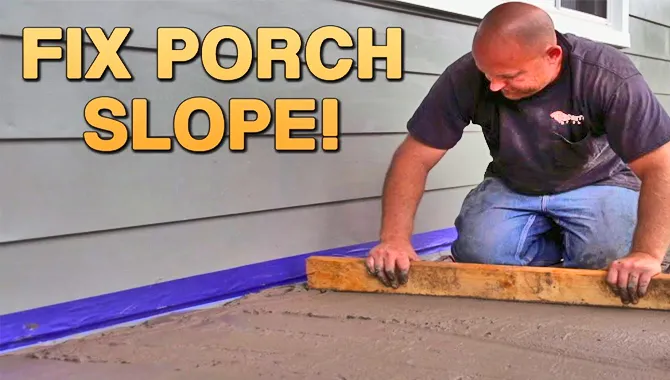
After appropriate measurements, now is the time for concrete sloping. Here are the basic concrete sloping steps-
- In the mixer, make some concrete mix. Keep the mix wet because while you clump it using your hands, it will adapt to its shape. If it becomes much wetter, the concrete will lose its ability to retain the slope’s shape. Fill the wheelbarrow with the mix. Dig up a layer of dirt onto the floor area around your perimeter.
- Make a slurry around one of the walls. This slurry is a three to four inches wide “curb” of compact concrete that extends all the length of a perimeter wall. Use your chalk mark as a guide for height. With the wood spatula or trowel, compress the shoveled mix until you have a border about the width you want and somewhat taller above your chalk line.
- Use your rubber hammer. Tap the leveling into the surface of the floor. The aim is to imprint the leveling throughout the full length of the floor until it becomes even with your chalk marking for height. Tap the level carefully throughout its length to embed it into the concrete’s top thoroughly.
- Lower the level to expose the imprint. Remove any extra material from either end of the imprint. Insert the flat metal trowel tip into one end of the floor. On either side, the spatula or trowel’s sides will extend into the mix.
- Slide the spatula into the concrete carefully and remove unnecessary material. Use the imprint as guidance for the base of the metal spatula. Flatten the full upper floor with mild force on the flat metal spatula to achieve a completed surface. Repeat the procedure around the border unless you have 4 leveled walls.
- Fill up about a fourth of the floor space between the wall concrete and drain. Fill up one-quarter of the space of a large pie wheel. Put the mix into the spot. Cover the spot with at minimum an inch of concrete adhesive.
- With the flat wood spatula, press the mix into the spot. Keep a straight edge over the top of the drain and place the other end over the top of concrete to fill the gap across the center of the space. Gently push or slide the straight edge sideways to “reduce” the top of the mix uniformly between the drain and the concrete.
- Around the drain, Rotate the straight edge, making sure that one end is always contacting the drain and the other is always lying on top of concrete. To compensate for more or fewer lengths, swap out straight edges as needed. The excess mix should be dragged away from the drain into an open space.
- After you’ve pushed the leftover mix aside from the compacted surface, use the flat metal spatula to smoothen the space between both the wall concrete and drain. Pour additional concrete mix into the next portion of the flooring. Work your way all around the drain till you come to an end.
How Much Slope?
Adding a slope to your concrete driveway can add a touch of sophistication and luxury to your home. It’s essential to determine the slope of your concrete before getting started, so use a level and plumb bob to ensure clearance underneath and around your foundation is correct. If necessary, increase or decrease the grade of your concrete using gravel, sand, or crushed stone.
It’s also essential to make sure trim along the edge is even so it looks uniform from one side of the house to the other. Once the slope is figured out, it’s time to start laying down the concrete! Make sure to use high-quality concrete that will last for years. Have fun with this project – it will surely add character and beauty to your home.
Conclusion
Measuring the slope amount is essential for concrete sloping. Allow the concretes to harden or cure completely. This complete curing will avoid scraping into the floor when “coating” the mix with straight edges of the spatula.
When pouring concrete, whether for a foundation, the same method of pushing away extra mix with a straight edge spatula is utilized. However, you must wait a short while for the concrete to harden.
Until it becomes stiff during curing, poured concrete is too wet to support the slope. I hope now you understand how to slope concrete.
FAQs
What Are The Different Types Of Sloping Tools?
There are a few different types of sloping tools that you can use to slope concrete. The plumber’s slope is the most common type, consisting of two boards – one at a 45-degree angle and another at an 8-degree angle. This slope helps easily cut the angled pieces before attaching them with screws. You may also need a wet saw or jigsaw to cut the angled pieces before attaching them with screws. To make it even easier, install precast concrete steps that already slope for you.
Can I Do An Automatic Slope On My Driveway Using A Computer Program?
Yes! You can use a program to create a perfect slope on your driveway. There are a few programs that you can use, but make sure you read the instructions carefully before starting, as there may some tedious tasks involve. Some of the popular programs include SlopeMaster and Driveway Pro.
What Are Some Tips For Preventing Water Damage When Sloping Concrete?
There are a few things that you can do to help prevent water damage when sloping concrete. 1. Have a trowel or measuring tape to ensure the depth of your slope is correct. Make sure the surface you’re sloping is flat and free of any bumps or irregularities.
This will help ensure the concrete slopes smoothly and won’t cause any damage. 2. Use durable materials like rebar when slopes are exposed to weather conditions. Rebar is more durable than other materials and can withstand harsher weather conditions. 3. Always slope concrete correctly to avoid water damage. Slope concrete gradually so it doesn’t get too steep or too shallow. Doing so will minimize the chances of water damage taking place.
How Can I Make My Slope More Sturdy?
One way to make your slope more sturdy is by using a higher weight-to-volume ratio cement. This means that the amount of cement per square foot is greater than average, creating a sturdier foundation. Additionally, make sure the aggregate you use for your slope is at least two inches thick and large enough so it will cover the entire area of your desired slope.
Is It Necessary To Use A Waterproofer When Sloping Concrete?
Ideally, you will want to use a waterproofer when sloping concrete to keep the concrete wet and ready for the sealant. A waterproofer can help to prevent the concrete from drying out prematurely, which can cause it to crack or split. If you are using a self-leveling sealant such as Asphalt Shingle Sealer or Polyurethane Thinset, there is no need for any additional steps. However, if you use a more traditional type of sealant like Mortar & Pestle Sealant or Waterproofing Compound, it’s recommended to use a waterproofer. This will help to ensure that the sealant will adhere properly to the concrete.

I am passionate about tools and electric work. I love finding new tools and experimenting with them.

